
While Linux has proliferated extensively in the server arena in the recent past, client networks are still dominated by Windows devices. This means, things that we take for granted in a client environment such as DDNS are not as matured as they are in Windows environment. One may ask whether the recent surge in Linux based clients such as IoT devices has changed this equation. But the nature of these devices is different from Windows based clients that they mostly rely on outbound connection to internet. Since they seldom require other hosts to initiate connection to them, their operation doesn’t rely much on Dynamic DNS.
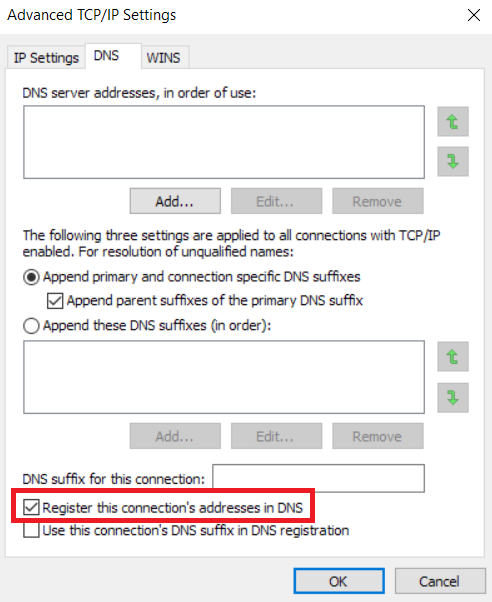
So, what does it take to make a Linux client register dynamically in a Windows environment? At its basic, the entire process relies on Dynamic DNS as explained in RFC2136. In a traditional windows environment with AD, this process is taken care by client OS. Every time a Windows PC gets an IP address from DHCP server, it would send a DNS Update (Opcode = 5) request to its registered DNS server. Performed manually, this is same as typing “ipconfig /registerdns” at an elevated command prompt. This behaviour can be modified by accessing DNS section of Advanced TCP/IP settings of a network adapter.
When we ask a Linux client to do the same (later I will explain how it can be configured to ask), it won’t work unless the DNS server is configured to accept “Insecure updates” (Which is a major security risk if you need to ask).
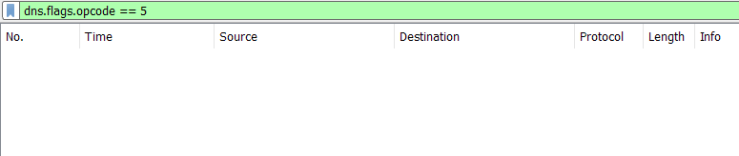
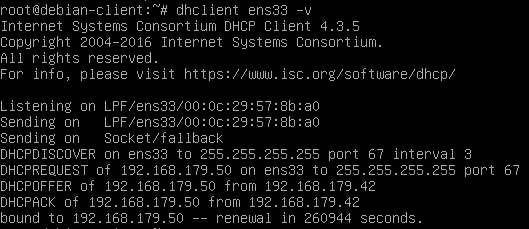
Take a look at the capture of Linux client performing DNS update, you can see that the server comes back with a UPDATE REFUSED response.

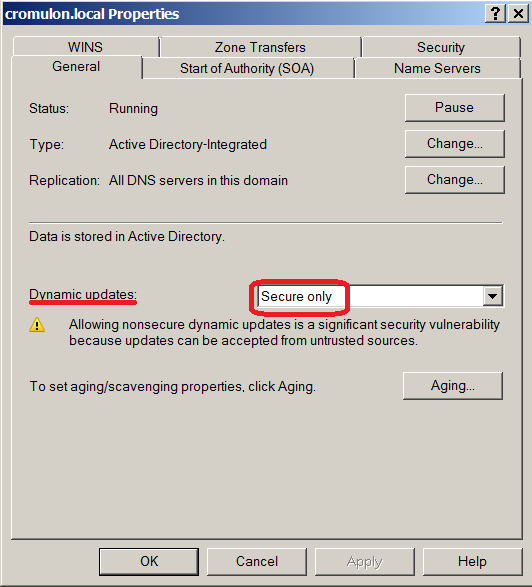
This is because our DNS server is enabled with secure updates which means only authenticated clients can send update.
The client is expected to send a transaction signature along with the update request. There are different types of signatures such as a TSIG resource or the SIG(0) or GSS-TSIG signatures. In Windows world however, only GSS-TSIG signatures as described in RFC3645 are understood and accepted.
Looking at a capture from a Windows PC joined to domain, one can see the Windows Device sending Update request with GSS-TSIG resource.

Given this background, let us explore some of the options available to setup DDNS for Linux based clients. In this series of posts, I will explore 3 options:
- Configure DHCP server to perform DNS registration on behalf of the clients
- Join the Linux devices to AD domain and configure them to dynamically update
- Setup a new sub-domain running a dedicated Linux BIND server and configure DNS forwarding on Microsoft DNS server.
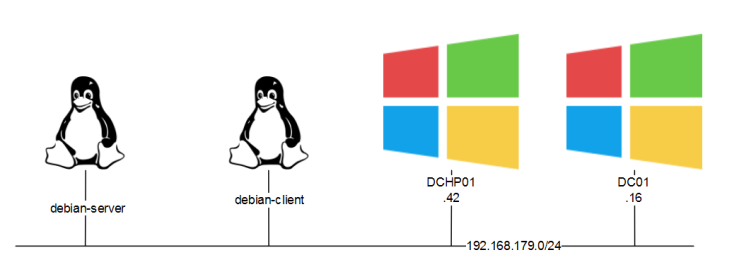
Our environment has the following setup:
- Microsoft Active Directory environment with DNS server installed in Domain controller and a DHCP server running separately on a different host. All are running on Windows Server 2008 R2.
- DNS is configured to accept only Secure updates.
- Two Linux devices running Debian Stretch operating system. One of them will act as DNS server in one of the scenarios.
The solutions we discuss should meet the following objectives:
- Update DNS when the device gets an IP address
- Perform periodic update to DNS server to protect against expiry
- Fully automated with very little or no hand-coding on client devices, assume no automation tools like Puppet or Chef
- Scalable to hundreds or thousands of devices
Point 3 is important to me since I had to work out a solution at work where we are using hundreds of Raspberry Pi’s, all booting the same image cloned on to flash disks. So, editing config files on each of them is not an option (we will come to this later).
Configuring DHCP server to perform DNS registration on behalf of the clients
This is the simplest and most reliable solution of the available options. This method makes use of DHCP option 81 as defined in RFC4702, which is used to convey a client’s FQDN to a DHCP server as part of DHCP process.
An aside: RFC doesn’t mandate whether a DHCP server should register client’s DNS or not. It is left to site-specific policies, which may differ per the security context of the site.
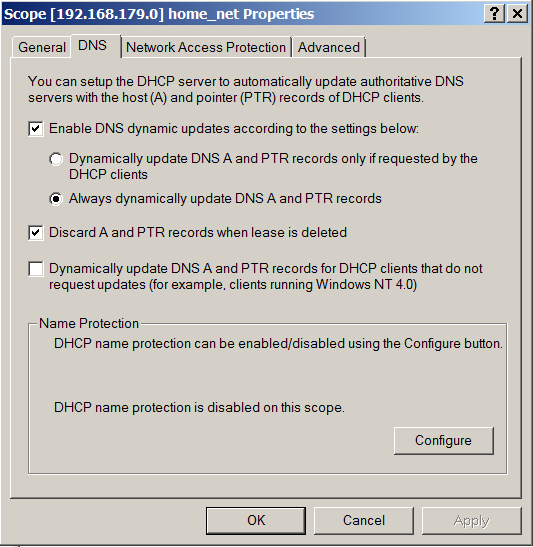
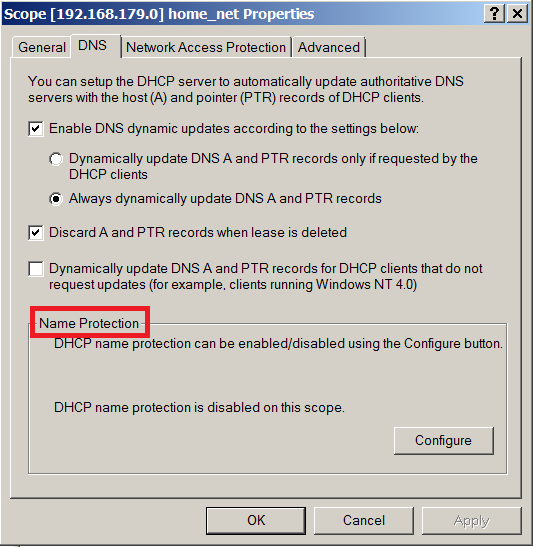
The default setting in a Microsoft DHCP server scope is as follows (Right click on scope name -> Properties to reach here):
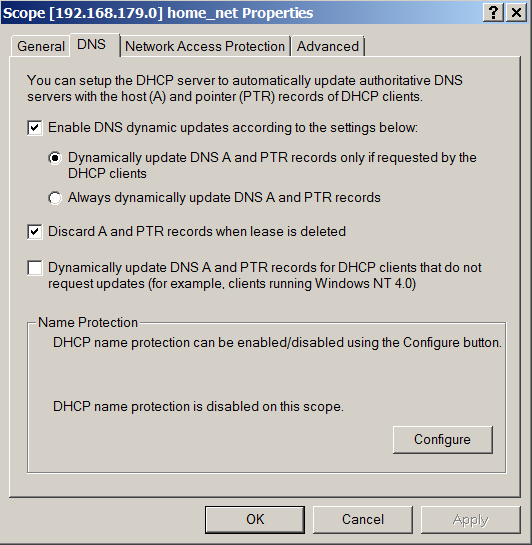
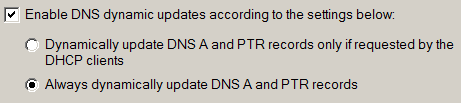
Understandably, this only updates to DNS server if requested by the client. What happens if we select the option to “Always dynamically update DNS A and PTR records”? Is that what we want?
If you trigger a DHCP request from the client, you will notice that this doesn’t work.
This setting merely controls whether a DHCP server should update ‘A’ record or not. The label “Always dynamically update DNS A and PTR records” is misleading since it applies only for the clients that request a DNS update. By default, a client is responsible for updating the A record and DHCP server is responsible for updating the PTR record. Selecting the second option forces DHCP server to update A record as well. But the prerequisite is that the client should request for DNS update.
The two options above correspond to the two cases discussed in RFC4702

For our Linux clients, the option we need is the last check box. Let us turn this on and trigger a DHCP request from our client.

When we check the DNS server, we can see that the A record successfully is created.

On the capture, we can see secure DNS update message being sent from the DHCP server (Note that the DNS clients always tries insecure updates first and gets rejected by the server).

For a home environment, this is almost enough. But for production environments, with multiple DHCP servers, this is not enough. The problem is that, in such setup the DHCP server becomes the owner of the A and PTR records (see below). It is fine as long as the DHCP server is alive to create and remove records. But when it goes down, its peer DHCP server won’t be able to do anything about those records.
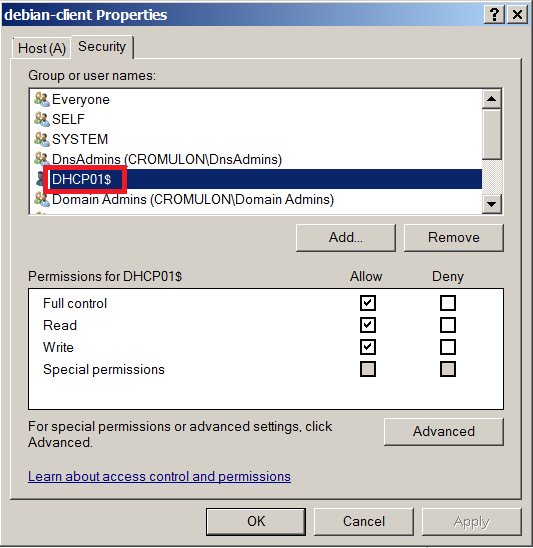
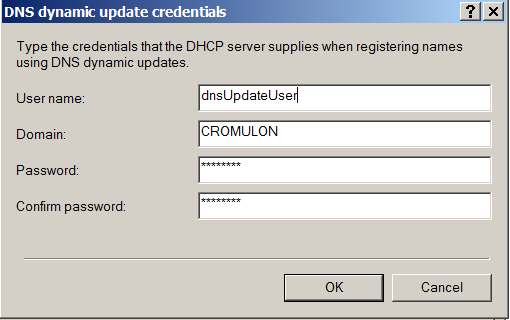
This link explains the issue in more detail. Let us follow the advice, create a dedicated user account for updating DNS and delete the old record with DHCP server as owner. Do not grant any extra privilege to this account. Just adding to DNSUpdateProxy group should be sufficient (Right click on IPv4 -> Properties -> Advanced).
As usual, let us go ahead to trigger an update.
As expected, new A and PTR record gets created.

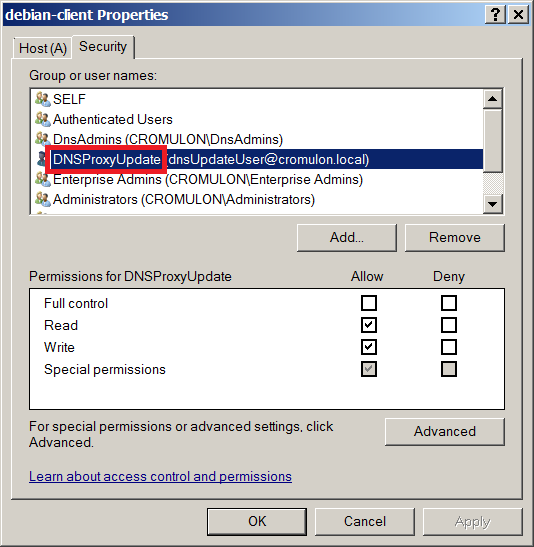
If we check the ownership, we can find that the record is owned by DNSProxyUpdate group.
Finally, let us discuss the option called “Name Protection” at the bottom of the dialog box.
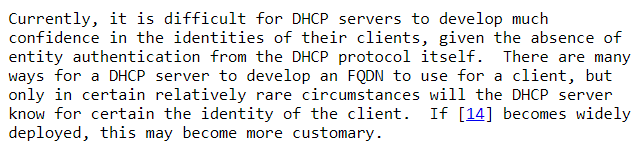
This forces DHCP server to manage the entire lifecycle of your client’s A and PTR records. If you are going to let your DHCP server manage client’s A record, I don’t see any reason to keep this disabled. It will also protect you from “Name Squatting” by offline clients. RFC4701 describes the problem as:

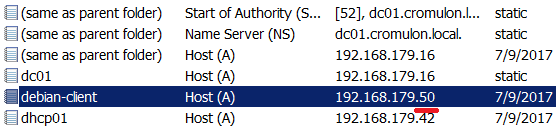
Let us see what it means to turn on this option. First, we keep it disabled and bring two clients online with same hostname, one after other. All is well when the first client comes online and gets an IP address 192.168.179.50.

DNS also gets updated accordingly.
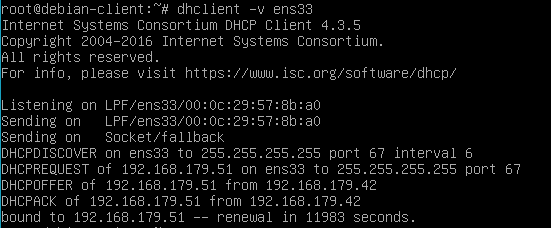
Let us bring another Linux client online and change the hostname to same as this host. Then perform a DHCP request from this host.

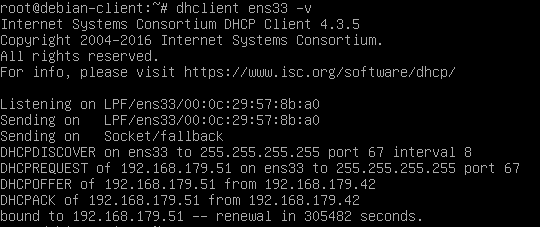
DHCP server assigns IP address 192.168.179.51 and sends an update to DNS server. Note that the DHCP server makes no fuss about two hosts sharing the same hostname. For all it knows, it could be the same host with multiple interfaces.

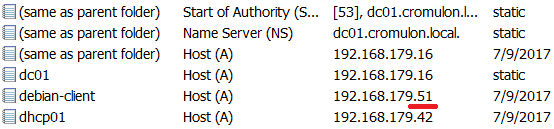
On the DNS sever side, we see that it accepts this update without any hesitation. The only problem is that this overwrites the existing record, while the client is still online. So, anyone trying to talk the first node ends up talking to the second node.
Clearly, DHCP server is not a reliable source of identity. RFC4703 briefly mentions the inability of DHCP server to provide any sort of assurance.
Let us see what happens when we enable “Name Protection”.
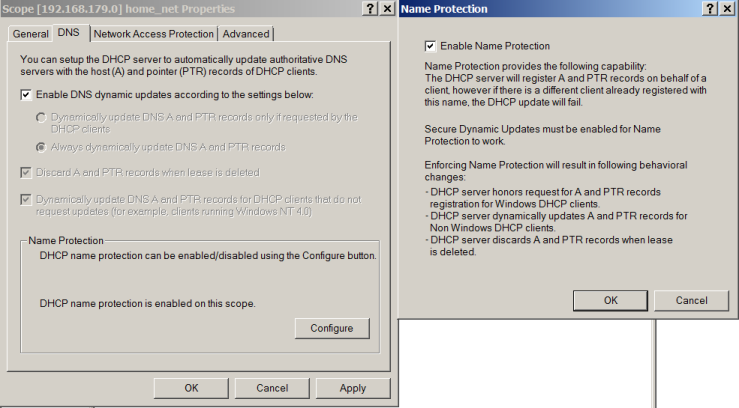
As soon as we enable this option, first thing we notice is that all other options are greyed out. This is because, with Name Protection enabled, it is always the responsibility of DHCP server to perform both A record and PTR record updates.
Let us wipe the slate clean, by releasing IP address from both the clients and deleting the existing DNS & DHCP records.
Now when you bring the first Linux client online, you can see that the DHCP server performs a new type of record registration called DHCID.

A new record type DHCID appears in the DNS server.

Let us bring up the impostor and request DHCP address. It gets an IP address of 192.168.179.51.
As usual, DHCP server is very generous about having two hosts sharing the same hostname.

But no new DNS entry is created.

Looking at the capture, we can see that the DNS registration fails with a response that RRset does not exist.

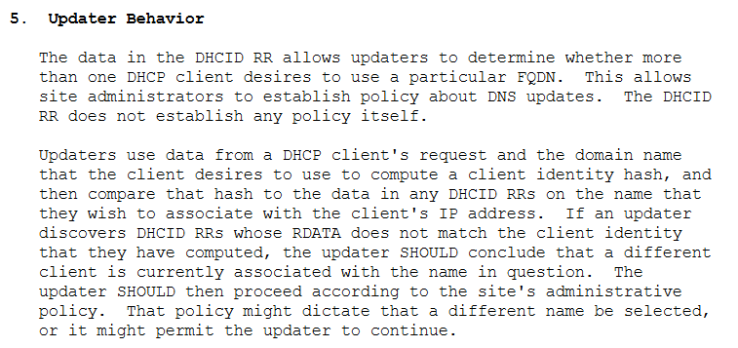
This message means that DHCID value calculated from the new update packet doesn’t match with any DHCID RR’s stored in the server. This behaviour is described in RFC4701.
This is as much as we need to know about configuring a Microsoft DHCP server to perform Dynamic DNS for Linux clients. In the upcoming posts, let us explore the other two options.
